Are you looking for budget-friendly ways to send money home from Japan or domestically? We’ve got some of the best, tried-and-tested ways to get your cash anywhere in the world without losing to fees and unfair currency exchange rates.
Gone are the days when you only have the option of making expensive wire transfers through your bank to send money home. You can now send well-earned cash to loved ones conveniently and efficiently, thanks to technology. We will explain how transfers work in Japan, from manual transactions at ATMs, online banking, or through e-wallets.
What does furikomi means?
In Japan, a bank transfer or remittance is called furikomi. This is used to transfer money to any local bank account and can be done conveniently through an ATM. You can also use this method to pay rent, utility bills, and credit card bills as long as the destination account is Japanese. This method eliminates the need to go to your nearest bank branch and fill up forms for the transfer.
While many use the furikomi feature to send money domestically, you can still maximize this method for an international transfer. For example, we will discuss in detail how Wise (formerly Transferwise) can be linked to your Japan bank account, thus giving you access to all currencies in the world. You only need to furikomi to Wise’s MUFG (Mitsubishi UFJ Financial Group) account and consider the transfer complete.
The steps to making a bank transfer through an ATM
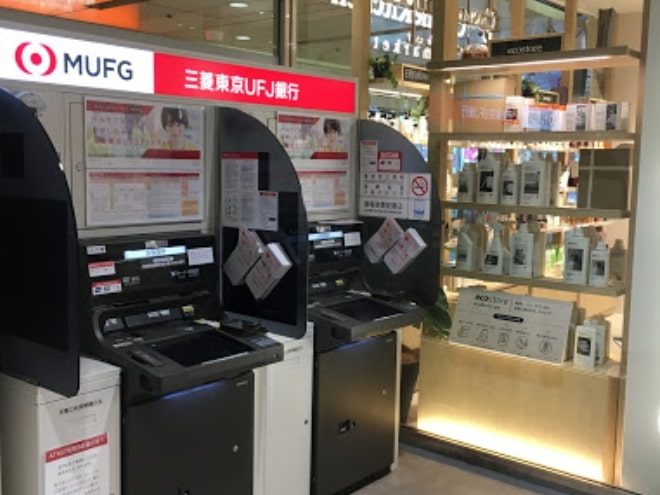 The process of making a furikomi is simple too! You need your passbook or cash card. When you go to your bank’s ATM, look for お振り込み(ofurikomi – bank transfer) or ご送金 (gosōkin – remittance). Take note that although most banks now offer an English version of common services like deposit, withdrawal, and passbook update, the furikomi option sometimes disappears when translated. Not to worry, the steps aren’t complicated, regardless of the kanji.
Right after choosing furikomi, most banks will give you one or two screens for fraud warnings (select the typically green or neutral colored button to proceed or the red button to cancel). Some banks will also give you another screen for info on when the transfer will be processed if it’s a weekend or holiday and the banks are closed.
The following steps will usually be the method of withdrawing the money (cash card or passbook). You will then need to input your four-digit PIN, the amount, the corresponding yen symbol if required, then click はい to proceed.
If this is your first time to send to a particular account, you can search for the bank details and register it for quicker access and repeated future transfers. Most banks will have a list of all the other local banks, so it’s recommended to know the kanji of the bank institution, branch name, and type of account (regular/savings or checking) beforehand.
You might also like:
- How to be vegan in Japan
- What is it (really) like to buy a Japanese abandoned akiya home
- Top 5 free museums in Osaka
Get around the Kanji
We’ve got you covered on the kanji revolving around Japanese banks. Check out the following table for easy reference.
|
Kanji |
Romaji |
English |
|
お振り込み |
ofurikomi |
Bank transfer |
|
暗証番号 |
anshou bangou |
Pin |
|
受取人 |
uketorinin |
Account or beneficiary name |
|
振込先 |
furikomi saki |
銀行名 |
|
銀行名 |
ginkoumei |
Bank name |
|
支店名 |
shiten |
Branch name |
|
金融機関コード |
kinyuukkan koudo |
Branch code |
|
口座番号 |
kouza bangou |
Bank account number |
|
普通 |
futsuu |
Regular/savings account |
|
当座 |
touza |
Checking/current account |
|
訂正 |
teisei |
Correction (usually yellow button) |
|
取り消し |
torikeshi |
Cancel (usually red button) |
Here’s a pro tip for beginners who might get intimidated by the Japanese characters: Google translate! Nothing stops you from turning on your phone and directing it over the screen for a quick translation. It’s better to press the correct buttons than make a mistake along the way.
Top ways to make a bank transfer
Disclaimer: I am a loyal patron of Wise. Not only is the user interface soothing to the eyes and easy to navigate, but its fees are also ridiculously low. At the same time, the currency exchange rates come very close to market standards! Yes, the verification process might be long, but it is all worth it in the end. You can even create multiple currency accounts within your profile, enabling you to conveniently receive and send in this currency. Each account has a designated routing number which can be used much like the typical bank account details.
I am ranking Wise as the best bank transfer method after using PayPal, Payoneer, Skrill, Western Union, and so on. Here are a couple of screenshots explaining why it deserves the top spot. I am trying to send ¥10,000, and this is the comparison between the two.


Just the comparison of the currency exchange is big. ¥10,000 to euros in Wise is 77.28 while the recipient only gets 74.95 through PayPal. Do you see the disclaimer or PayPal where the final amount and fees may change? Compare that with Wise’s guaranteed rate for 48 hours. With Wise, the rate won’t change for two days even if you need some time to transfer the amount into your account.
What’s more, Wise only takes ¥102 in fees. That’s it; there are no hidden fees that will surprise the sender at the end. Meanwhile, PayPal takes at least ¥400 for the transaction. There can also be a transfer fee for sending the money from a bank account to PayPal.
The bank transfer is free with Wise, mainly because it has an MUFG account, so I easily log into my MUFG online banking, click the registered Wise recipient, type the amount and one-time password, and it’s all done within minutes.
Time also works differently with these two companies, where Wise sends the euros within 9 hours (tried and tested to be true) while there are times when I’ve completely forgotten a PayPal transfer and an email will only inform me that there was a delay; hence the money was sent late.
 There’s also the issue of privacy and security. I know a couple of people who receive legit-looking emails from “PayPal.” When they click the link, their account immediately gets compromised, and random unauthorized transactions are made. PayPal might have its encryptions, but it appears that they’re hackable. Meanwhile, Wise has two-way authentication, wherein a login from a desktop will trigger a notification on a smartphone or device to authorize the attempt. Wise also asks users to add a backup phone number if your current one is inaccessible.
Lastly, Wise has a debit card that works like a credit card for online purchases or physical transactions. I was invited to be an early debit card user, and it looks flashy cool. As long as I have some money in my account, I can use the card at any ATM (even internationally) that accepts Mastercard or even at stores as a mode of payment. Just in case you’re wondering, I’m not sponsored by Wise (haha!).
![]() Of course, if you prefer convenience and don’t mind the extra fees, then PayPal is the way to go. You practically only need an email address, and you can create an account and send money, too. You can also check if your online banking has the PayEasy feature (seen above), which lets you pay utility bills, load e-wallets, and more. This way, you really don’t have to step out to an ATM to make payments or transfer money.
Of course, if you prefer convenience and don’t mind the extra fees, then PayPal is the way to go. You practically only need an email address, and you can create an account and send money, too. You can also check if your online banking has the PayEasy feature (seen above), which lets you pay utility bills, load e-wallets, and more. This way, you really don’t have to step out to an ATM to make payments or transfer money.
![]() Whether you’ll be taking the manual approach of pressing buttons at a machine or going the digital route of online banking, all it takes is a few tries, and you can get the process memorised. If you’re like me and send money or receive payments regularly, the efficiency and seamless approach of pairing online banking with an e-wallet yield the most savings.
Whether you’ll be taking the manual approach of pressing buttons at a machine or going the digital route of online banking, all it takes is a few tries, and you can get the process memorised. If you’re like me and send money or receive payments regularly, the efficiency and seamless approach of pairing online banking with an e-wallet yield the most savings.
Be sure to follow us on Facebook, Instagram, Twitter, and Pinterest for more fun stuff! Visit our online shop: shop.itsyourjapan.com

Hana Otsuka
Hana is a freelance writer, finance analyst, and chef who pursues various hobbies. She aspires to be a philanthropist who helps out others in any way she can.